Know what details to include – or not include – in the flexible circuit drawing.

Since our most recent column covered drawing notes for flexible circuits, this may be a good time to go over many of the other features a good flexible circuit drawing should include, and maybe a few things to avoid.
Along with the drawing notes, the rest of the drawing features help define the details of the part as well as some of the acceptability requirements.
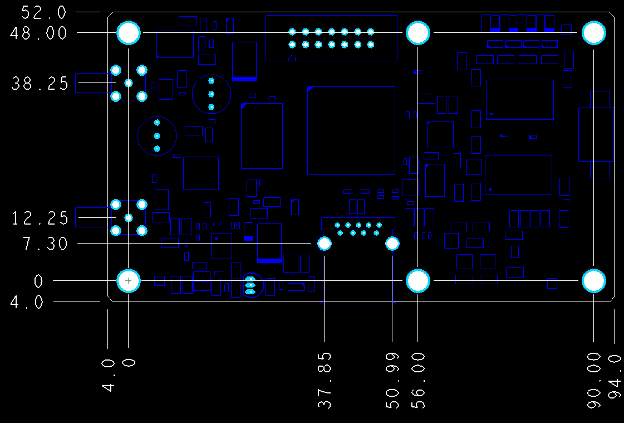
For starters, drill tables are important to help describe via structures. The manufacturer needs to know which holes are which. If there are filled vias and/or via-in-pad-plated-over (VIPPO), for instance, they are identifiable with a flag note, or segregate filled from non-filled holes on the table.
Fabricators need to understand your via strategy. Is this a simple through-hole construction, or are buried, blind and/or microvias employed? Sometimes we see blind vias overlapping layers; for example, one blind via from layer 1 to 8 and another from layer 12 to 6. Sounds cool on paper (or in CAD), but we can't do that. The fabricator can help you align the via choices with cost and reliability.
Multiple via structures will dictate how many times a particular layer is copper plated. This will impact the ability to etch those layers once plating is performed. You may receive feedback on the line widths and spaces on these plated layers.
Tolerances on the drilled holes are important, too. Most plated component holes are toleranced as +/-0.003″ (+/-75μm). Some may be +/-0.002″ (+/-50μm) if they are receiving compliant pins at assembly. If so, please note that sometimes the pin manufacturer not only defines the finished hole size, but the drill size as well. This is to ensure proper insertion and retention force.
For vias, it is common to permit a +0.003″ (75μm)/- nominal. This permits the fabricator to drill vias at nominal and reduce in size with copper plating and final finish. This can maximize annular ring.
Board profile and hole location tolerances are also important. This is a place where it can be tempting to be too conservative. Tight tolerances can lead to unnecessary scrap. Note that these are flex and rigid-flex circuits; unlike a rigid PCB, they can bend and move. Build slack into your design. Most assemblies can easily accommodate a 0.020″ (500μm) profile tolerance on the part outline. Exceptions can be noted where needed.
Hole true position can be another spot to get tripped up. For flex, the guidance is to have different datums for each rigid or stiffened area, and a loose tolerance from datum to datum. This becomes more important as the part gets larger. Flex materials can expand and contract upwards of 0.001″ per inch of length due to changing environmental conditions. I have seen cases of long parts with tight tolerances end to end that could not meet the tolerance due to stretch and shrink. The parts still worked fine in the application, but could not get past receiving inspection.
Conversely, if the part shrinks and no longer can be installed, it probably was not designed long enough as a nominal. You don't want the part to be pulled tight like a banjo string from connection point to connection point. Add some service and install length. Flex can be your friend – it should be the thing that accommodates all the other tolerances in the assembly, not the other way around.
While a drawing should always show a part in its flat state, including an isometric view of the part in its installed shape is helpful. This gives the fabricator insight into the intended use, and may spark conversations about how the part is bent and if the stackup is compatible with that. I have seen cases where a short flex region was expected to bend 180° while the layer count was four or more layers fully bonded. It became obvious the bend radius was going to put excessive strain on the outside radius of the flex.
If the part is a flex with stiffeners added, top, bottom and side views can be beneficial to clearly note which side of the part the stiffeners should be added. Same goes for countersunk holes: fabricators need to know which side to countersink from and what diameter and angle on the countersink.
In "the old days," designers would provide drawings chock full of dimensions. This communicated to the fabricator exactly where all the holes were, where a part edge was, where a radius was located or where a chamfer started. It could show dimensions of rigid to flex transitions and everything else. Today, we have CAD. All that information is embedded in the data files. There's no need to duplicate it on the drawing. It can be a cause for a drawing discrepancy if the drawing doesn't match the data – and trust me, that happens daily. It also means that for any AS9100 qualification or first article, every one of those dimensions needs to be inspected, adding time and cost.
Another dimension to consider is board thickness. With flex and rigid-flex, we may have different thicknesses in different areas of the board. Some designers define nominals with a tolerance for each thickness. This can be appropriate if fitment is critical or when there are through-hole components with leads of a certain length. If you are more concerned about a maximum thickness, however, note that. Often, the fabricator can devise a stackup that can be thinner and save on volume and weight.
For the flex sections, I suggest noting a reference thickness if you can. Often, the finished flex region may end up thinner than expected and could fall out the bottom of a tolerance window. This usually means the part is just a little more flexible – who doesn't want that?
In the end, identifying the things that are critical to the assembly and performance are where you should concentrate and communicate your needs. Where you have latitude to be more "tolerant" with your tolerances, please do. Doing so will get you a product that works as intended without unnecessary costs or delays.
Nick Koop is director of flex technology at TTM Technologies (ttm.com), vice chairman of the IPC Flexible Circuits Committee and co-chair of the IPC-6013 Qualification and Performance Specification for Flexible Printed Boards Subcommittee; This email address is being protected from spambots. You need JavaScript enabled to view it.. He and co-"Flexpert" Mark Finstad (This email address is being protected from spambots. You need JavaScript enabled to view it.) welcome your suggestions.
PCB East, the electronics industry trade show for the East Coast! Coming May 9-12, 2023


