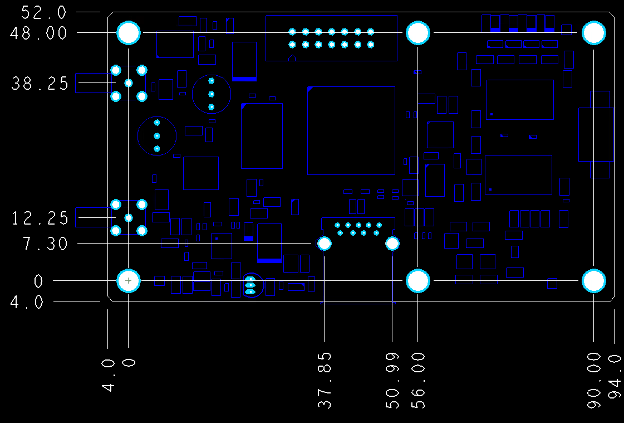
Tight spacing (less than 8 mils) between drilled holes and copper traces increases fabrication complexity and yield risk.
In the world of PCB manufacturing, knowledge of manufacturing constraints can help you design PCB using techniques that can guarantee reliable, economical and high-yield manufacturing. A wrong approach at the PCB layout stage can impact the complexity and cost of its fab and assembly. Understanding this enables you to develop smart practical design solutions for economical manufacturing and rapid prototyping cycles.
In PCB manufacturing, drilled hole-to-trace clearance (the distance between the edges of a drilled hole) and the nearest copper trace is a critical design parameter. The industry-standard recommendation is ≥8 mils (0.2mm) (Figure 1). When designs fall below this threshold, manufacturing complexity rises sharply, driving up costs, extending lead times, lowering yields and introducing additional challenges related to drilled-hole aspect ratio.

Figure 1. Example of 8-mil hole-to-trace spacing, illustrating recommended minimum clearance between a plated through-hole and adjacent copper to support standard PCB fabrication yields.
Why Clearance Matters
When the clearance between a plated through-hole (PTH) and nearby copper trace or pad edge drops below 8 mils per side, the risk of manufacturing defects increases sharply. Drill bits can slightly wander due to tool deflection, material hardness or machine tolerance. With less than 8 mils spacing, even a slight drill’s positional tolerance can cause the hole wall to cut into adjacent copper, which can lead to several issues, including:
- Broken traces or pads if the drill overlaps copper features;
- Reduced insulation between copper and the plated barrel, increasing the risk of shorts or leakage;
- Higher scrap rates and rework, because small spacing pushes the limits of standard PCB fabrication.
In addition, tighter spacing usually means using smaller drill sizes, which increases the aspect ratio (board thickness to drill diameter). The higher the aspect ratio, the more difficult it is to achieve reliable plating, often leading to issues such as barrel cracks or voids. All this adds complexity, raises manufacturing costs, extends lead times, and increases overall risk.
Aspect ratio considerations. Aspect ratio in PCB manufacturing is simply the ratio of board thickness to the diameter of the smallest drill hole (Figure 2). It is calculated by dividing the PCB thickness by the smallest drill diameter, and expressed as
Aspect ratio = PCB thickness / smallest drill diameter
Most PCB manufacturers can accommodate aspect ratios in the range of 8:1 to 10:1. In practical terms, this means that a 0.3mm (about 0.01") drill hole can be reliably produced in a board that is up to 3mm (about 0.12") thick. A higher aspect ratio means deeper, narrower holes, which are harder to plate and more prone to reliability issues.

Figure 2. Relationship between drill diameter and PCB thickness, showing how smaller drill sizes increase aspect ratio and introduce plating and reliability challenges.
When drill diameters become smaller to permit tighter routing, the aspect ratio increases. Higher aspect ratios are more difficult to plate properly, and this can result in problems, including barrel cracks, plating voids or reduced via reliability.
If the drill-to-trace clearance falls below 8 mils, challenges increase. Manufacturers must ensure extremely precise drilling while also managing the added challenge of plating high-aspect-ratio holes. This combination significantly increases both cost and risk.
In cases where high aspect ratio holes are required, manufacturers often need to use advanced plating techniques. These may include special plating chemistries or multiple plating cycles, which not only increase complexity but also extend the overall fabrication time.
Manufacturing challenges below 8mil. When drill to trace spacing falls below 8 mil, the PCB moves into a far more complex manufacturing zone. Standard mechanical drilling is often insufficient, and fabricators may need to use processes requiring specialized equipment that significantly increase costs.
At the same time, alignment between drilled holes and copper layers must be nearly flawless, which forces manufacturers to rely on advanced registration systems, including laser direct imaging (LDI), x-ray registration systems and optical targets (fiducials), adding both time and process steps.
Smaller holes also mean higher aspect ratios, and plating these tall, narrow vias is much more difficult, often leading to voids or long-term reliability issues (Figure 3). Also, the tighter spacing magnifies tolerance challenges, so more boards tend to fail inspection or electrical testing, driving down yields and pushing per-board costs even higher.

Figure 3. Comparison of hole-to-trace spacing at 8 mils versus 6 mils, highlighting how reduced clearance increases drilling tolerance risk.
Cost and lead time implications. When drill-to-trace clearance stays at or above 8mil with an aspect ratio of 10:1 or less, boards can usually be built using standard processes at normal pricing and lead times. Once the clearance drops below 8 mils and the aspect ratio increases, however, the design is treated as HDI (high-density interconnect). This increases fabrication costs 30–50% because it often requires advanced drilling methods, additional plating cycles, or even resin-filled microvias. On top of that, yields tend to drop, further raising the cost per board. Lead time is also heavily affected; what might normally take five to 10 working days can stretch to 10 or even 20 days or more, depending on the complexity. Because only a limited number of fabricators can meet such tight requirements, sourcing adds delays and expedite options, if available at all, can be extremely expensive.
Industry Standards and Recommendations
Industry standards such as IPC-2221 and IPC-6012 define the minimum drill-to-copper clearance and aspect ratio requirements for reliable PCB designs. Manufacturers build according to these rules with practical limits, while HDI designs may push beyond them, resulting in higher cost and complexity.
IPC-2221 and IPC-6012. These IPC standards set the baseline rules for PCB design and fabrication quality. For Class II and Class III boards, they emphasize maintaining sufficient drill-to-copper clearance and controlling aspect ratios. This ensures reliable plating, strong annular rings and long-term performance.
Manufacturer rules. Most PCB shops follow practical guidelines of at least 8mils drill-to-copper spacing and aspect ratios no greater than 10:1. Staying within these limits keeps fabrication straightforward, yields high and costs reasonable.
HDI designs. In high-density interconnect (HDI) designs, spacing can sometimes be reduced to 7–7.5 mils and aspect ratios pushed up to 15:1. However, this requires advanced processes such as laser drilling, sequential lamination and specialized plating. These capabilities are not standard among all fabricators, and when available, come with higher cost and longer lead times.
Consequences of Ignoring the Rules
Ignoring the minimum drill-to-copper clearance and aspect ratio rules can cause serious problems. At the design review stage, fabricators may reject the board outright, forcing redesigns and delays. Even an accepted design may be reclassified as an HDI build, which significantly raises costs and extends lead times because of the need for specialized drilling, plating and inspection. Additionally, high-aspect-ratio holes are harder to plate consistently, leading to thinner copper, voids or cracks that reduce long-term reliability. In mission-critical applications, these weaknesses can cause field failures such as opens, shorts or barrel cracks – problems that could have been avoided by following the basic clearance and aspect ratio guidelines.
Akber Roy is CEO and founder of RUSH PCB Inc. an electronics manufacturing company specializing in PCB design, fabrication and assembly services; This email address is being protected from spambots. You need JavaScript enabled to view it. (rushpcb.com).


